By mid-afternoon, your head sits closer to the screen than it did at 9 AM. Your shoulders have rolled forward. Your neck feels tight, and you cannot say when it started.
That slow drift is what most remote workers call bad posture. Physical therapists have a name for one common version of it: upper cross syndrome. In most cases, your desk setup is what keeps it going.
I have worked remotely for more than five years. I started with a simple desk and no ergonomics at all. Later, I spent long stretches working from a laptop on my bed. The biggest change came when I got a proper chair, the right equipment, and a real desk.
This guide shows you how to build that upper cross syndrome desk setup, step by step. It works for a WFH setup, a hybrid work schedule, or a coworking space. You will get exact measurements, honest warnings, and a short routine to back it up.
Quick answer: To set up a desk for upper cross syndrome, raise your screen so the top sits at eye level. Bring your keyboard close so your elbows bend near 90 degrees. Sit with your feet flat and your back supported. If you use a laptop, add a stand plus a separate keyboard and mouse. Then change position every 30 minutes and add a few daily exercises.
This guide is general information, not medical advice. If you have numbness, tingling, or pain that keeps getting worse, see a doctor or physical therapist.
How a Desk Setup Feeds Upper Cross Syndrome
You do not need a medical degree to follow this. You only need to know what is happening in your body and why your desk is part of it.
What is happening in your body
Upper cross syndrome is a muscle imbalance. Some muscles get tight. Others get weak. The two groups cross over each other, which is where the name comes from.
Here is the pattern:
- Tight muscles: The chest, the front of the shoulders, the back of the neck, and the tops of the shoulders. These get short from being held forward all day.
- Weak muscles: The deep muscles at the front of the neck and the muscles between your shoulder blades. They get stretched and stop doing their job.
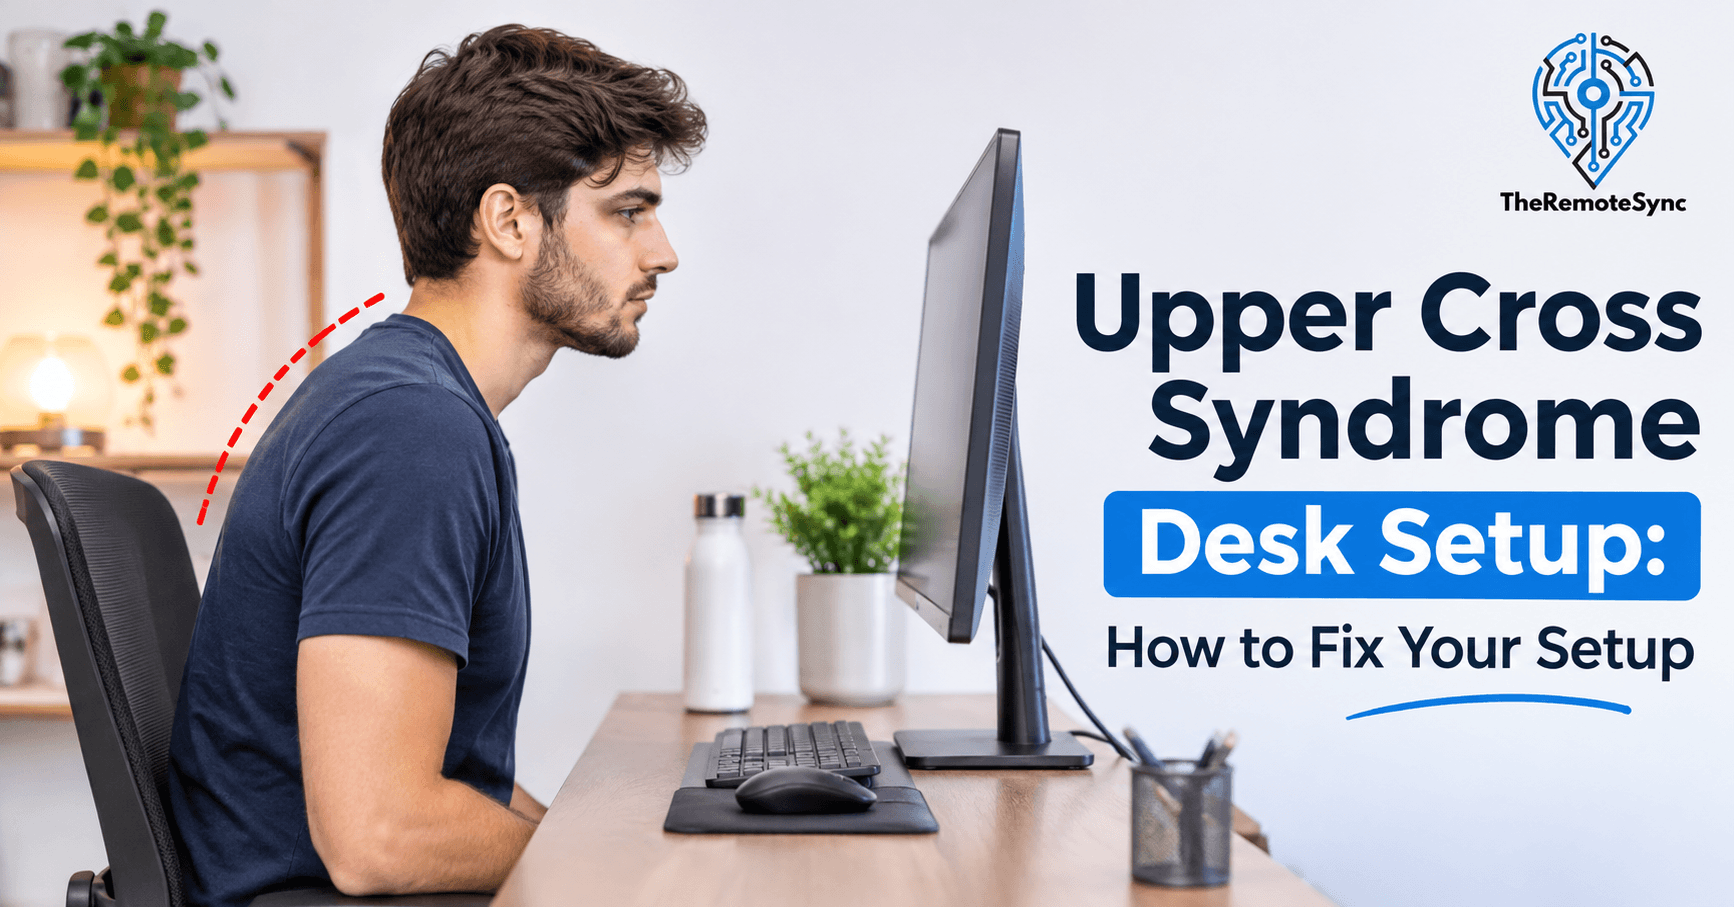
The result looks familiar. Your head sits forward. Your shoulders round. Your upper back curves.
People call this tech neck, nerd neck, laptop hunch, or turtle posture. Clinicians also use the names shoulder girdle crossed syndrome and upper crossed syndrome. They all describe the same posture pattern.
It is a pattern, not a disease. Only a trained professional can tell you if you have it. But if your neck strain, shoulder pain, or upper back tightness gets worse as the workday goes on, this pattern is worth checking.
Can a bad desk setup cause it?
It can feed it. Your desk is rarely the only cause. Past injuries, phone use, sports, and stress all play a part.
But a desk that holds you forward for eight hours a day trains your body into that shape. Muscles adapt to the positions you hold most. Hold your arms forward, and your chest gets shorter. Let your upper back hang and it gets weaker.
There is a second problem too: sitting still. When you work from home, you lose the small movement that came with a commute and walks to meetings. A good setup helps. A good setup plus regular movement helps much more.
The good news is that your setup is the part you can change fastest. It costs less than you think, and the first change takes about 15 minutes.
What I Learned Going From a Bed to a Real Desk
My first setup was a simple desk. No riser, no support, and nothing adjusted to my body. It was a flat surface, and I worked at it.
Later, I worked from my bed with a laptop for hours at a time. A bed looks comfortable. But it has no back support, no edge for your forearms, and no way to lift the screen.
The laptop sits low, so your head tips down to meet it. Your shoulders curl in to reach the keys. Then hours pass in that shape.
I am not saying a bed caused a medical condition. I am saying it is the worst place to hold that position for hours.
The biggest improvement came when I got a proper chair, the right equipment, and a real desk. Here is what that taught me:
- Fix the setup as a group: A good chair with a low screen still pulls your head forward. A good screen with a bad chair still rounds your back. The pieces work together.
- Support beats willpower: Telling yourself to sit up straight lasts about ten minutes. A setup that holds you in a good position works all day.
- Fit matters more than price: A setup is good when it fits your body. A high price does not guarantee that.
The rest of this guide turns those lessons into steps you can follow today.
Do a 5-Minute Posture Check First
Before you change anything, find out where you stand. This gives you a baseline you can compare against later.
- Take a side photo at 9 AM and again at 3 PM: Prop your phone on a shelf and sit as you normally work. Compare the two photos. Many people see their head move forward by the afternoon.
- Check your head over your shoulders: In the photo, your ear should sit roughly above your shoulder. If your ear is well in front, your head is forward.
- Try the wall test: Stand with your heels, hips, and shoulder blades against a wall. Then see if the back of your head can touch the wall without tilting your chin up. If it cannot, your head has drifted forward.
- Notice your reach: When you type, check if your elbows sit far in front of your body. Reaching forward pulls your shoulders forward too.
- Notice your shoulders: Look for shoulders that creep up toward your ears while you type. This means your desk or armrests are too high.
Keep the photo. You will use it again in the last section.
Upper Cross Syndrome Desk Setup, Step by Step
Work from the ground up. Start with the chair, then the desk, then the keyboard, then the screen. The order matters because each part depends on the one before it.
Step 1: Set your chair first
Your chair sets the base for everything else. If the chair is wrong, every other adjustment will be off.
- Seat height: Your feet should rest flat on the floor. Your knees should sit at about the same height as your hips, or a little lower. If your feet dangle, use a footrest. A sturdy box or a stack of books works fine.
- Seat depth: Leave about two to three fingers of space between the seat edge and the back of your knees. A seat that is too deep makes you slide forward and slouch.
- Back support: Your lower back should touch the backrest. The curve of the support should sit at the curve of your lower back.
- Recline: A slight recline lets the backrest do some of the work. Cornell University’s ergonomics guidance suggests a recline between about 100 and 130 degrees.
- Armrests: Set them so your shoulders stay relaxed while your forearms rest lightly. If the armrests push your shoulders up, lower them or remove them.
A chair does not treat upper cross syndrome. It makes good posture easier to hold. If you are using a dining chair, a small rolled towel behind your lower back helps.
Step 2: Fix desk height for neck and shoulder pain
Desk height decides where your arms and shoulders sit all day. Get it wrong, and your shoulders shrug for hours.
With your chair set, rest your hands on the desk. Your forearms should sit roughly level with the floor. Your shoulders should hang loose.
Cornell’s guidance lists about 28 inches as a general desk height for computer work. Your own best height depends on your body. Use the forearm check, not the number.
If your desk is too high, you have two options:
- Raise your chair: This lowers the gap between your elbows and the desk. Add a footrest so your feet stay flat.
- Use a keyboard tray: A tray puts the keyboard lower than the desk surface. It is the best fix when the desk cannot move.
Dining tables are often higher than office desks. If you work at one, this step matters even more.
Step 3: Place your keyboard and mouse for rounded shoulders
Keyboard position for rounded shoulders comes down to one rule: do not reach.
Pull the keyboard close to the edge of the desk. Your upper arms should hang near your sides. Your elbows should bend around 90 degrees. Keep your wrists straight, not bent up or down.
NIH ergonomics guidance says to set keyboard height so your shoulders can relax and your arms can rest at your sides.
Place the mouse right next to the keyboard, at the same height. A mouse placed far away makes you reach with one arm. That pulls one shoulder forward all day.
This step matters for upper cross syndrome because reaching keeps your chest muscles short. Short chest muscles pull the shoulders forward.
Step 4: Raise your screen for forward head posture
This is the step that changes the most. Monitor height for forward head posture is simple: if the screen is low, your head goes low and forward to meet it.
Follow these rules:
- Top of the screen at eye level: The same NIH guide places the top of the monitor at about seated eye level. Sit tall and look straight ahead. Your eyes should land near the top edge of the screen.
- Directly in front of you: A screen off to the side makes you twist your neck. Twisting for hours builds tension on one side.
- About an arm’s length away: If the screen is too far, you lean in. If it is too close, your eyes strain.
- Adjust for glasses: If you wear bifocals, you may need the screen lower. Ask your eye doctor what works for your lenses.
You do not need to buy a stand to start. A stack of sturdy books or a box under the monitor works for now.
If you use two monitors, put the one you use most directly in front of you. Set the second one slightly angled. If you use both equally, center the gap between them in front of your nose.
Step 5: Fix the laptop problem
A laptop creates a built-in conflict. The screen and keyboard are attached. If the keyboard is at the right height for your arms, the screen is too low for your neck.
The fix is to split them. Raise the screen on a stand. Then use a separate keyboard and mouse at elbow height. If you want options, our laptop stand guide covers what to look for.
Here is where this gets useful for remote workers who move around. Build a small two-piece kit: a folding stand and a compact keyboard and mouse that fit in a pouch. You can set it up in about a minute at a home desk, a coworking space, or a hotel room.
One warning. A stand without a separate keyboard makes things worse. The keyboard rises to chest height, and your shoulders hike up to type. The stand and the keyboard must come as a pair.
Step 6: Stop leaning in to read
Many people lean toward the screen without noticing. They do it because the text is small, the screen is dim, or glare hides the words.
Your head follows your eyes. If your eyes strain, your neck pays for it.
Try these quick fixes:
- Make text bigger: Zoom your browser and apps to 110 or 125 percent. You will see the change in a day.
- Fix the light: Put the screen at a right angle to windows, not facing them. Glare makes you lean in to see.
- Match screen brightness to the room: A bright screen in a dark room tires your eyes. A dim screen in a bright room makes you squint.
Upper Cross Syndrome Desk Setup at a Glance
Use this table as a quick check after you finish the steps. Save it or print it.
| Part of your setup | Target | Common mistake |
| Chair height | Feet flat, knees near hip height | Feet dangling or knees far above hips |
| Back support | Lower back touches the backrest | Sitting on the front edge of the seat |
| Desk height | Forearms level, shoulders relaxed | Desk too high, shoulders shrugged |
| Keyboard | Elbows near 90 degrees, close to your body | Reaching forward to type |
| Mouse | Right next to the keyboard, same height | Mouse far away on the desk |
| Screen height | Top of screen at eye level | Screen too low, head tipped down |
| Screen position | Centered, about an arm’s length away | Screen to the side or too far back |
| Laptop | On a stand, with a separate keyboard and mouse | Laptop flat on the desk or bed |
| Movement | Change position every 30 minutes | Sitting still for hours |
Does a Standing Desk Help With Forward Head Posture?
It can help, but not for the reason most people think. A standing desk is not magic. The benefit comes from changing position.
A 2024 clinical trial looked at standing desk use in people with forward head posture. The authors found it was linked to less muscle fatigue and less discomfort. They also noted that few studies have looked at forward head posture and standing desks. So treat this as promising, not final.
Here is the catch. Standing does not fix posture by itself. You can slouch standing up. You can push your head forward standing up. Many people just carry their sitting habits into standing.
The same rules still apply when you stand:
- Elbows near 90 degrees: Raise the desk until your forearms sit level. A desk set too high brings your shoulders up.
- Screen top at eye level: A low screen at a standing desk is a common mistake. It forces your head forward even more than sitting.
- Short stretches at first: Stand for a short time, sit when you tire, then repeat. Switching is the goal, not standing all day.
If a full standing desk costs too much, try a desk converter that sits on top of your current desk. You can also use a tall counter with a laptop stand and a separate keyboard.
Desk Exercises That Back Up Your Setup
A better setup removes the cause. Exercises fix the muscle imbalance that has already formed. You need both.
The pattern needs two things: stretch what is tight, and strengthen what is weak. Here is a short routine for a remote worker’s day. You can do it in about five minutes.
- Chin tucks (weak neck muscles): Sit tall. Pull your chin straight back, as if making a double chin. Hold for 5 seconds. Repeat 10 times. This wakes up the deep muscles at the front of your neck.
- Wall angels (weak upper back): Stand with your back against a wall. Raise your arms in a goalpost shape. Slide them up and down while keeping your back, head, and arms touching the wall. Do 10 reps. If it is hard, use a smaller range.
- Doorway chest stretch (tight chest): Rest your forearm on a door frame. Step through gently until you feel a stretch across the chest. Hold 20 to 30 seconds on each side.
- Band rows (weak mid-back): Use a light resistance band. Pull your elbows back while squeezing your shoulder blades down and together. Do two sets of 10 to 15.
- Upper back extension (stiff upper back): Sit in your chair with your hands behind your head. Gently lean back over the top of the backrest. Do 5 slow reps.
Use this as a starting plan, not a prescription. Do chin tucks and wall angels once or twice a day. Do the full set a few times a week.
Stretching should feel like gentle tension. Stop if you feel sharp pain, numbness, or tingling. For the full routine with progressions, read our guide on upper cross syndrome exercises.
Build a Work Day That Keeps You Moving
A perfect setup still fails if you hold it for six hours straight. Your best posture is your next posture.
For anyone doing ergonomic setup for 8+ hours of remote work, these habits matter as much as the desk:
- Use a 30-minute rhythm: Set a timer. When it goes off, stand, roll your shoulders back, and walk for a minute. This breaks the long hold that tightens your chest.
- Take calls on your feet: A call is a free chance to stand or walk. You do not need a screen for most audio calls.
- Raise your phone to eye level: Looking down at a phone is the same forward-head position as a low screen. Bring the phone up instead of dropping your head.
- Eat away from your desk: A real break resets your position. Eating at the desk keeps you in it.
- Keep the bed for sleep: If you work from home, a bed or sofa invites the same low-laptop problem. A fixed work spot makes the right setup the easy choice.
Hybrid workers face a different problem. Every office day starts with a desk set for someone else.
Spend your first minute adjusting it. Set the chair height first, then pull the keyboard close, then raise the screen with a stand or a few books. It takes less time than a coffee order, and it protects your whole day.
What to Buy First (and What to Skip)
You do not need to buy everything at once. Fix what costs nothing first, then add gear in this order: screen height, separate keyboard and mouse, chair, then desk.
Ergonomic chair for forward head posture
A chair that fits you matters more than a chair with a high price. Look for adjustable seat height, adjustable seat depth, lumbar support, adjustable armrests, and a backrest that reclines.
Our guide to the best ergonomic chair for forward head posture lists what to compare.
Here is a test that spec sheets will not give you. Sit down, plant your feet flat, and check if the seat edge hits the back of your knees. If the seat depth cannot be adjusted and it does, the chair is wrong for you. Also, the word “ergonomic” on a label does not mean adjustable. Check the features, not the name.
If you can, buy from a store with a return window. You only know if a chair fits after a full workday in it.
Laptop stand for rounded shoulders
A stand matters because it fixes screen height, which is the biggest driver of forward head posture. Look for adjustable height, a stable base, and a folding design if you travel.
See our picks for the best laptop stand for remote work for options.
Check the height range before you buy. With the stand open, the top of your laptop screen should reach your eye level while you sit. A stand that lifts only a few inches may not be enough if you are tall.
External keyboard and mouse for laptop ergonomics
Once the screen is up, your hands need their own height. A separate keyboard and mouse let you set both screen and arms correctly.
Our page on external keyboard and mouse for laptop ergonomics covers the choices.
Here is a tip that is easy to miss. A compact keyboard without a number pad puts the mouse closer to your body. Less reach to the mouse means less pull on the shoulder.
What to skip for now
- Posture braces: A brace may remind you to sit up. It does not build strength in weak muscles. Treat it as a short-term reminder at most.
- A premium desk before the basics: A costly desk with a low screen and a bad chair is still a bad setup. Fix the basics first.
Common Mistakes That Keep the Problem Going
Even careful people repeat these. Check your setup against this list.
- Raising the screen but not the keyboard: The laptop stand fix only works with a separate keyboard. Without one, your arms rise and your shoulders shrug.
- Setting a great chair too high or too low: Fancy chairs only help when the adjustments are right. Always recheck seat height.
- Standing with a low screen: Stand up and the same forward-head position comes with you. Raise the screen to eye level.
- Forcing a stiff, perfect posture: A rigid back tires fast. Aim for relaxed and supported, then move often.
- Skipping the exercises: A better setup stops the pull. It does not strengthen weak muscles on its own.
- Ignoring pain that keeps growing: A setup change should ease strain over time. If symptoms spread or worsen, get checked.
When to See a Professional
A setup guide cannot diagnose you. Posture problems can look like other conditions.
See a doctor or physical therapist if you notice any of the following:
- Numbness or tingling: Especially in the arms or hands. This can point to a nerve issue.
- Weakness in your arms or hands: You may drop things or feel grip loss.
- Severe or worsening headaches: Tension headaches are common with this pattern, but new or severe ones need a check.
- Pain that wakes you at night: Posture pain usually eases when you rest. Pain that does not is worth a visit.
- No improvement after several weeks: If setup changes and gentle exercise do not help, get a proper assessment.
A physical therapist can check your posture, confirm what is going on, and build a plan for your body.
Frequently Asked Questions
What is the best desk setup for upper cross syndrome?
The best setup keeps your head over your shoulders and your arms close to your body. Put the top of your screen at eye level, your keyboard at elbow height, and your feet flat with your back supported. Then change position every 30 minutes. No setup works if you never move.
Can a bad desk setup cause upper crossed syndrome?
It can contribute. Long hours with a low screen and reaching arms train your muscles into the pattern. Other factors matter too, such as phone use, past injuries, and sports. Your desk is the factor you can change fastest.
How high should my monitor be to prevent forward head posture?
The top of the screen should sit at about eye level when you are seated. Center it in front of you, about an arm’s length away. If you wear bifocals, you may need it a little lower.
Does a standing desk help upper crossed syndrome?
It can help because it lets you change position, which cuts muscle fatigue. But standing alone does not fix posture. Your screen still needs to sit at eye level and your elbows near 90 degrees.
Can a laptop stand fix forward head posture?
A stand fixes one major cause, which is a low screen. But it only works with a separate keyboard and mouse. Add a good chair, regular breaks, and a few exercises for the full result.
What are the symptoms of upper cross syndrome from desk work?
Common ones include shoulder, neck, and upper back pain, tension headaches, and restricted range of motion. You may also notice a forward head, rounded shoulders, and a tight chest. Symptoms alone do not confirm it, so see a professional if they continue.
How long does it take to correct upper cross syndrome?
There is no fixed timeline. Many people feel less strain within a few weeks of steady setup and exercise changes. Lasting change in posture habits usually takes longer, often a few months. Consistency matters more than speed.
Do I need an ergonomic chair for upper crossed syndrome?
You do not need one, but it helps. A chair with adjustable height, lumbar support, and armrests makes good posture easier to hold. No chair treats the condition on its own. If your budget is tight, fix your screen height and keyboard first.
Your Next Step: Fix Your Setup in 15 Minutes
You do not need a full redesign. Do these four things today:
- Raise your screen: Put the top at eye level. Books or a box work for now.
- Pull your keyboard close: Bend your elbows near 90 degrees and keep your shoulders loose.
- Set a 30-minute timer: Stand and walk for a minute each time it goes off.
- Take your side photo: Do it now, then repeat it in one week and compare.
Then read our guide on upper cross syndrome exercises to build the muscles your new setup will let you use. For the full picture of the condition, start with our upper cross syndrome guide.
Discover more from TheRemoteSync
Subscribe to get the latest posts sent to your email.